
Installation · Meta Quest
Virtual Desktop
Virtual Desktop enables a wireless connection between a Meta Quest headset and SteamVR on your PC. You need the Virtual Desktop app on the headset and the Virtual Desktop Streamer app on the PC.
First-time setup
On your PC
-
Download the Virtual Desktop Streamer app to your PC: VirtualDesktop.Streamer.Setup.exe.
- Run the downloaded setup wizard to install the Virtual Desktop Streamer app on your PC.
- Open the Virtual Desktop Streamer app on your PC.
- Click Accounts in the left sidebar.
-
In the list of Oculus usernames, enter your Meta Quest username and then click Save. You can find your username at secure.oculus.com/my/profile.
-
Purchase the Virtual Desktop app for Meta Quest: Virtual Desktop on the Meta Store. When purchasing, use the same Meta account you are logged in with on your Meta Quest VR headset.
On your VR headset
- Turn on your Meta Quest VR headset.
-
Put on your headset and press the Oculus/Meta button on your right Touch controller to open the main menu.

Position of the Oculus/Meta button -
Make sure your Meta Quest VR headset is connected to a Wi-Fi network and can access the internet (guide from Meta).
-
Open the App Library (the icon made up of a 3-by-3 grid of dots), located on the right side of the main menu.
- Search for “Virtual Desktop” using the search field.
-
In the list of search results, click the Virtual Desktop application to install it.
- Wait until the installation process is complete.
Starting ViRTUE with Virtual Desktop
Follow the instructions in the Preparation section before you begin the steps below.
On your PC
- Start the PC and log in to your user profile.
- Make sure SteamVR is NOT running.
- Start the Virtual Desktop Streamer app on your PC.
On your VR headset
- Turn on your Meta Quest VR headset.
-
Put on your headset and press the Oculus/Meta button on your right Touch controller to open the main menu.
Position of the Oculus/Meta button -
Open the App Library (the icon made up of a 3-by-3 grid of dots), located on the right side of the main menu.
-
In the list of apps, select the Virtual Desktop app to start it. If you cannot find it, you can also use the search function.
- On first launch, the Virtual Desktop app guides you through a short tutorial.
-
After you finish the tutorial, you see your PC’s desktop. Now press the menu button (the icon made up of 3 horizontal lines) on your left controller to open the Virtual Desktop menu.
-
Click Launch SteamVR to start SteamVR on your PC.
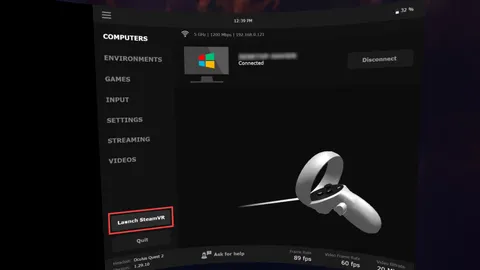
Launch SteamVR in the Virtual Desktop menu -
Once you see this environment, you are connected to SteamVR.

SteamVR is connected
On your PC
- Now switch to your PC.
- Start ViRTUE.
On your VR headset
- Now switch back to your VR headset.
-
Wait until ViRTUE has started.
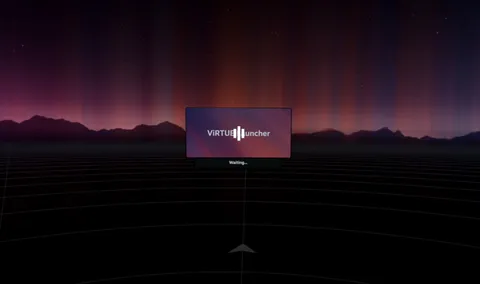
ViRTUE is starting -
Once you are in a bright cloud world, you have successfully started ViRTUE.

ViRTUE has started successfully
Virtual Desktop menu while connected to SteamVR:
When you are connected to SteamVR and want to open the Virtual Desktop menu, you have to press the menu button (the icon made up of 3 horizontal lines) on your left controller twice in quick succession. When you are not connected to SteamVR, a single press is enough.